Saturday 27 February
It's become traditional that I begin my summary by announcing the week's Juke Box Jury panel, so here goes: Jane Asher, Georgie Fame and Two-Way Family Favourites presenting duo Jean Metcalfe and Bill Crozier have been selected to cast their ears over the latest discs. Next it's the third in our weekly visits to the planet Vortis, where the Doctor finds himself addressed by the spooky voice of the unseen being called the Animus.


The Animus is under the impression that the Doctor and his friends are members of the Menoptra race, who are apparently massing in space ready to invade Vortis. In response, the Doctor starts talking like an astrologer.

The Animus isn't won over by his protests, and a strange gun thing mounted on the wall shoots at the TARDIS. The only effect it has, however, is to send all the Zarbi into a right tiswas (it doesn't take much to do this). The Doctor's delighted to find that, whatever the reason the TARDIS lost all its power, the problem's been righted by Vicki accidentally realigning the fluid link and getting its shields working again. Our heroes are now able to depart - the only snag is that Barbara's missing (and remains so all week, as Jacqueline Hill's on holiday).

On the planet's surface, an actual Menoptra, Vrestin, is scouting about, but flies off at the sound of approaching Zarbi.

The Animus demands to know how the TARDIS shield works, having decided it would be an ideal defence against the Menoptra. It offers the Doctor his freedom in exchange for the knowledge, and reveals that Barbara has been taken to be a slave at the Crater of Needles, "beyond my great web". The Doctor claims he can't do what the voice asks, but offers to get out his astral map to show where the Menoptra are gathering. The Zarbi hold Vicki hostage while the Doctor and Ian pop into the TARDIS to get it.
Vrestin comes in to land near the control centre, but our attention's diverted by a hapless Zarbi who wanders straight into the camera.

The Doctor and Ian briefly rest in the TARDIS, Ian keen to know the old man's opinion on the "beasties" who've captured them. The Doctor states the bleedin' obvious: "To use a term of Earth's, I suppose we should call them insects," . Ian says that he once saw a colony of ants eat their way through a house (in a film, surely?), and speculates that the Zarbi could do the same with a mountain. "So relentless, so indestructible," he muses - though from what we've seen so far the Zarbi seem to be more of a danger to themselves than anyone else. The Doctor's more interested in the mysterious "Queen of the Ants" who he's been speaking to.

They shuffle out the astral map, a cumbersome device that has to remain plugged in (fortunately it's got a long extension cord). The Doctor instructs Ian to track down Barbara, and has a plan of how it can be done.

He insists that the Zarbi "put him through" to their mistress, with one of the most glorious lines in Doctor Who history.

The Doctor claims that the power the Animus exerts over the centre is interfering with the working of his map, and manages to get it turned off for a bit (the Zarbi suddenly become entirely passive).

Ian makes a break for it, and the Doctor gives Vicki some chocolate to ease her worries: "He's really very good at this sort of thing," he tells her - a nice little moment that reminds us of how the relationship between the time traveller and his companions has developed since the show began.

Ian feels his way out of the centre, bumping into a Zarbi that definitely hasn't been pacified. It's not the most edifying of spectacles, but if you've ever wanted to see a man wrestle a giant ant, this is the show for you.


Ian eventually gets the better of his arthropod antagonist and legs it. The Animus, having learned of his escape, switches the power back on around the Doctor and Vicki and they soon have one of the previously placid Zarbi rearing up against them.


Once Vicki's regained her senses, the Doctor sends her in to the TARDIS to fetch a box which, it turns out, contains one of his "specimens". Vicki's response is understandable in the circumstances.

No, it's not that kind of specimen, of course. But whether it's any more pleasant all depends on how you feel about spiders, because inside the box is a dirty great big one in a glass case. The Zarbi certainly aren't keen. In fact, they seem absolutely terrified of it.

While this has all been going on, Ian and Vrestin have been getting acquainted outside. When we cut to William Russell and Roslyn De Winter they spend several seconds waiting to be cued before the characters resume the conversation they're meant to be in the middle of. Vrestin's clearly keen on Ian, having given him the curious pet name of "Heron"(it's nice that Ian's got a space girlfriend for once, Barbara being the one who usually finds eager companions of the opposite sex all over space and time). Having agreed to accompany Ian to the Crater of Needles, Vrestin supplies an enormous chunk of exposition for Ian (and the viewer): the Menoptra were formerly the dominant life form on Vortis, while the placid Zarbi were "essential to the life pattern of this planet". But the Zarbi were "made militant" by a "dark power", and the Menoptra took flight (literally) to one of the strange new moons that had mysteriously appeared in the sky. The use of the word "militant" in particular makes it sound like writer Bill Strutton was aiming at an anti-trade union message (or maybe just an anty trade union message) - a reader informs me that anti-Communist messages are common in Mr Strutton's work. The Animus's HQ is known by the potent name of the Carsenome, reflecting how its malign influence has spread on the planet like a cancer. The Menoptra are now prepared to take back their world before the Carsenome eats up the whole planet.

Their conversation's eventually interrupted by the tell-tale boobly-bobbly noises of oncoming Zarbi. They find a hiding place, only for the ground to collapse beneath them...


Next, let's hop over to ITV for a brand new sitcom from ATV. The star is Charlie Drake (who also co-writes and sings the theme tune), and, like (I suspect) many people of my generation, I've only really been exposed to him before in that clip of him being knocked unconscious live on TV. I must admit it's a state I much prefer him in. I find his schtick a pain in the arse, to be honest - like a slightly more belligerent Norman Wisdom (who I'm not too keen on either). Anyway, while I may not be a fan of its star, The Worker has some excellent guest stars, and is fascinating as a (skewed) window into a long-lost world of work.

And of unemployment, too. We open at the labour exchange, where Mr Whittaker (Percy Herbert) sends the jobless who come to him off to new opportunities with motivational speeches. Until, that is, he comes to Charlie - who, we learn (after an interminable observational comedy routine about how people are always asking him what he wants even when it's obvious), has been coming to the Labour exchange every week for the past 20 years. He doesn't have any trouble actually getting work (this is an era of near-full employment, remember): the problem is keeping it. He turns up at the exchange every Monday and is sent off to a new position, gets the sack every Tuesday and comes back on Friday for his wages.

Charlie left his most recent job after injuring himself when clocking in. Mr Whittaker claims there are no jobs available, but then, as if by magic, a vacancy comes in over the phone and Charlie's sent off to Tottenham to take up his new duties - but first come the bewildering admin procedures a new employee's subjected to: "the machinery of organisation".

He checks in with impassive secretary Dilys Laye, her attention devoted entirely to an impressive adding machine, though he manages to establish from her what the job entails: putting plastic aeroplanes into boxes of cornflakes. Eventually he forces a kiss on her to make him pay her attention (yes indeed, yuk).


Charlie eventually gets in to see the personnel manager (Lloyd Lamble), who pays him little more attention than the secretary.

Next he has to see the cheerful aptitude consultant (Joan Benham), who subjects him to a series of psychological tests. When questioned about their significance she quickly reveals herself as a bundle of barely-suppressed neuroses.

After this it's the welfare officer (a wonderfully oleaginous Aubrey Morris), whose queries about the new employee's personal life call the fidelity of Charlie's girlfriend uncomfortably into question..

Charlie's now due to see the medical officer, but he's not around, so Charlie has to sort himself out. The biggest audience laugh of the episode comes when Charlie fiddles about with himself using a pair of forceps.


Charlie finally gets on to the shop floor at 4.45, just as the machines are being shut down. His fellow workers agree to keep them on a bit longer so he can get the knack of what he's meant to be doing, but as he tries to get to work he's mobbed by people wanting him to sign up for things: union membership, works outing etc.

A frazzled Charlie returns to the Labour Exchange, having (of course) lost the job. In what was left of the day he managed to box 4800 aeroplanes - but all in the same box.

Viewers not keen on Charlie Drake pratting about could instead tune in to BBC 1, where there's sinister doings afoot in Cornwall.


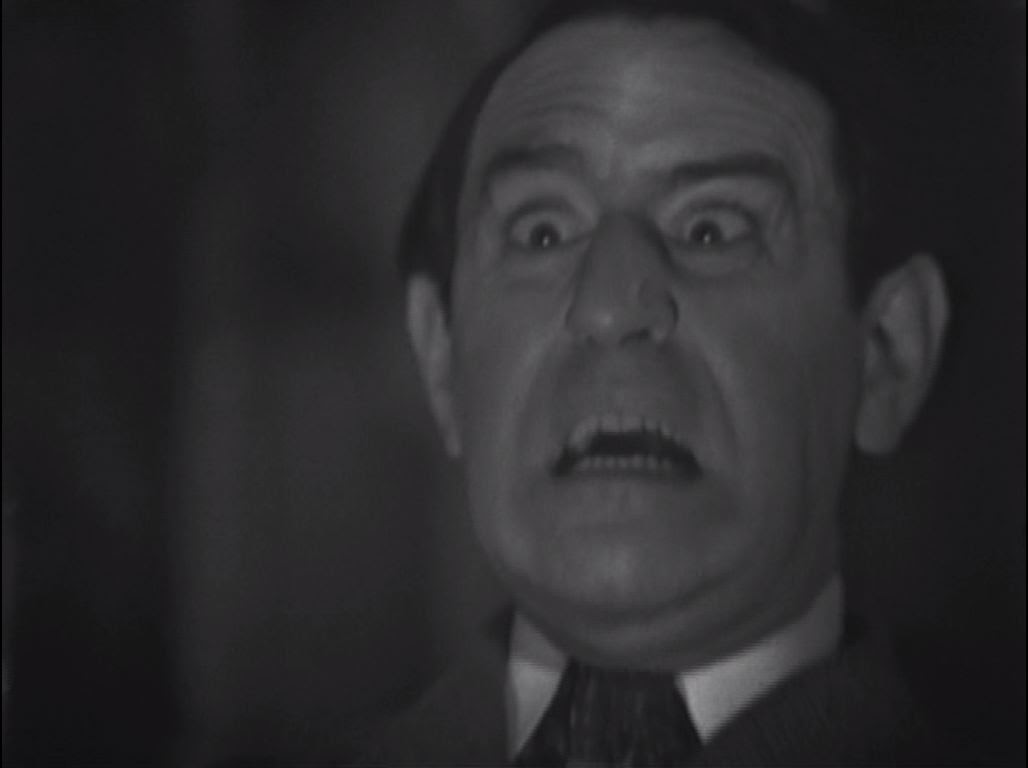
Tonight's Sherlock Holmes adventure begins with the genuinely disturbing spectacle of a pair of wild-eyed old men (Derek Birch and Frank Crawshaw) laughing uncontrollably as they sit at cards (the terrifying sound of their laughter would, many years later, be sampled to great effect on a Moon Wiring Club track). A woman (Camilla Hasse) sits with them, seemingly insensible. This grim scene is discovered by a distraught housekeeper (Nora Gordon).


As is often the way when something unspeakable transpires in a remote place, there's a famous detective holidaying nearby, Sherlock Holmes having been sent to Cornwall on doctor's orders. He's bored out of his brain, and welcomes the arrival at his holiday cottage of a panicky vicar (John Glyn-Jones), who tells him all about the horrible events of the night before. The three ghastly figures we saw were the Tregennis siblings, George, Owen and Brenda. Brenda is now dead, while George and Owen are hopelessly insane.

Holmes readily agrees to find out how this all came about, and then receives another visitor - Mortimer (Patrick Troughton), another Tregennis sibling, who escaped whatever fate befell the others when he left them the previous evening to return to his lodgings at the vicarage.

Holmes heads to the Tregennis cottage to examine Brenda's body, passed by the cart taking the insane brothers into care.

Mortimer claims that he lived apart from the others due to a row about money, but that this was all sorted out many years before. He says that he and his brothers had spotted someone lurking outside the night before, and Holmes clambers out of the window to investigate. When Mortimer joins him, Holmes "accidentally" shoves him into the mud in a ruse to examine his footprint.

As Holmes and Watson walk back to their cottage (the Cornish locations are the main thing in this adaptation's favour, other than its startling opening scene), they spot someone within - smoking a cigar, so unlikely to be the housekeeper.

It turns out that their uninvited guest is the aptly named Dr Sterndale (Carl Bernard), a famed explorer with a residence nearby. He demands to share in all Holmes' knowledge about the Tregennis case. Unimpressed with his brusque manner, Holmes shows him the door. Sterndale becomes more placid, revealing that he's a distant cousin of the Tregennises and knows them well. He was due to embark on a new expedition to Africa, but was called back to Cornwall by a telegram from the vicar apprising him of their terrible fate.

When Sterndale departs Holmes decides to follow him. Again the locations are put to good use, as the detective stalks the explorer across country and into the village.

When Sterndale conceals himself to listen in to a conversation between Mortimer and the Vicar, we're treated to an unsuccessful (but all the more charming because of it) attempt at matching up location film and studio-shot VT. Mortimer informs the vicar that his brothers seem to be hopeless cases.


Holmes, who was watching Sterndale watching the others, continues his pursuit of the explorer as he returns home. Meanwhile, Watson pops over to see the vicar, who seems rather chary about the telegram he supposedly sent Sterndale.


The next day, Holmes and Watson call on Mortimer, only to be greeted by an extremely flustered vicar: "We are devil-ridden, Mr Holmes!" Mortimer, you see, is dead - and he seems to have died in the same way as his sister (though he looks a lot less scary).

Holmes finds a mysterious, foul-smelling powder near the lamp in Mortimer's room, and deduces that the "strange and toxic effects" of this substance when burnt are responsible for what happened to the Tregennises. So, throwing caution to the wind (and by this point in his sojourn in the country probably desperate for a fix of anything), he decides to give it a go. He and Watson sit down and burn the powder. The nightmarish nature of its effects are conveyed by Douglas Wilmer's facial contortions: he certainly gives good rictus.
The open window seems not to limit the drug's powers, and it's only thanks to Watson coming to his senses for long enough to drag Holmes outside that the pair avoid their doom. Holmes dashes back in to get the lamp, and chucks it in the sea.

Holmes pinpoints the acquisitive Mortimer as Brenda's killer. But who caused his death? Well, the options are a bit limited and Dr Sterndale certainly seems the most likely person nearby to know about an exotic drug from a far-off place.
Confronted, Sterndale confesses that he and Brenda Tregennis were in love, a relationship complicated by Sterndale's estranged wife, and that he knew Mortimer was the killer because of the interest he showed in "the devil's foot" - the preserved root from which the powder was extracted. So he took his revenge.


Holmes allows Sterndale to travel on to Africa unimpeded, on the condition that he does not return.
And finally, this week's case study of a specimen inhabiting

The object of the programme's scrutiny tonight is Tim Gotha (Edward Judd, who, the credits inform us, appears by arrangement with Columbia Pictures Corporation), a construction engineer doing all he can "to get ahead in this rat race". His wife, Margo (Sylvia Syms, last seen in Tuesday's Danger Man), with her penchant for alcohol and affairs, isn't helping matters. The pair have a blazing row, overheard by their children, Cressida (Rachel Clay) and Robin (Michael Audreson).


All of a sudden things become a lot more blazing.

Tim puts out the fire, but the reason for it seems a mystery. Could it possibly have been the work of little Robin, whose bedroom floor is littered with broken toys, a testament to his inability to bear his parents' increasingly fractious relationship?


Corder accompanies Margo home to meet her children. I think little Robin is my new style icon.

Corder gets the reticent Robin to engage with him, but Tim isn't happy to see the psychiatrist in his home. Judd and Herbert Lom have a proper toupee-off. Corder's interested in Tim's whole wall of portraits of his prestigious German ancestors, and thinks Tim's suffering under the weight of them. Angry at the implication that he's the one who needs therapy, Tim fires Corder.

Corder's daughter Jennifer makes her first appearance of the series, her hair having been seriously peroxided. For anyone who can't remember what she looked like before, there's a handy photo reminder on Corder's desk. We're also reminded that Corder has a receptionist, Nancy, when she pops in to tell him that Tim's come to see him.

Having hit Margo the night before when they had a row, Tim's now willing to accept that he needs help. He tells Corder he regrets marrying Margo, and only did so because she was pregnant. Corder sees the lack of love Tim experienced as a child as the root cause of his problems. He thinks Tim needs to lose his obsession with his ancestors and realise he could be a better man than any of them.
Corder returns home that evening to find Jennifer's left arrows directing him to a tape-recorded message in which she instructs him to have a look at a book she's acquired, The Great Families of Europe, that could help with the Gotha case.

Here's Tim in his office, an image I show you purely because I like the health and safety poster on the wall.

The prolific Philip Latham turns in a bit part as a man from head office breathing down Tim's neck about the completion of his latest project...

...which is in trouble due to the intransigence of shop steward Jack Smethurst (his character's named Red, in case we didn't get it), who's planning a walkout over health and safety issues - even though he's been receiving a hefty bonus to ignore those very problems.

There's an accident on site, and Tim heads to the hospital, where Wanda Ventham appears briefly as a nurse. Corder happens to be there as well, and confronts Tim with the fact that he was, in fact, adopted by the Gotha family. Tim claims it's a smear put about by a jealous cousin, but Corder knows better - his father was in fact impotent and he's really the son of a wood carver (on his visit to the Gotha home Corder noticed some wood carvings that seemed not to fit with Tim's character). The nurse informs Tim that the workman has died.


Returning to the building site, Tim resolves to jump from a great height, but his saved by works foreman Darkie (Harold Goldblatt).

Some time later, Corder pays a visit to the Gothas, or the Schumachers as they now are, Tim having decided to return to the surname of his birth. Recovering from their recent ordeals, the family now seem happy - though if you ask me all those guns on the wall look a bit ominous. "Water is going to find its own level anyway," says Corder, sagely. "A little alcohol mixed in might speed its progress" - which is as good an excuse for a drink as any, I suppose.

Sunday 28 February

Troy Tempest's bored: he, Phones and Marina are all on standby in case there's an emergency but nothing's happening (Phones is busying himself with some Charles Addams cartoons stuck on a bit of paper).

Suddenly the alarm sounds, and Commander Shore informs them they'll be needed shortly - but no further information seems to be forthcoming, and Troy falls asleep.

He wakens to find it's time to take Stingray out, which he does. The nature of the emergency is still mysterious, though. We're given heavy hints about what's coming by Shore grumbling about Troy wanting to be "the big man" and insisting he'll "cut him down to size". "Why's the Commander trying to make me look small?" Troy wonders.
Suddenly, Stingray bumps up against what appears to be a wall of glass. A pan out reveals that the ship is now in a fish tank.


Understandably perturbed by this development, the crew decide to get on their hover chairs and have a look round their new environment. The actual miniature aquanaut figure that we see briefly is woeful.

They appear to be in a lavish, gigantic dining room. There's even a TV set - which they switch on and watch a news report about their own disappearance.

Inspecting the huge table in the centre of the room, Troy finds that the places are all laid for various antagonists he's come up against over the course of the series.

And the place at the head of the table is reserved for the most antagonising one of all.

Our heroes quickly hide as a gigantic Aquaphibian enters, dressed, comically, as a butler.

When he disappears again, Troy notices some discreetly labelled secret papers, which he unfurls to reveal full plans of the Marineville defence system.

Troy and Phones put a call through to Shore, who seems oddly unbothered by Troy's supposed disappearance and just tells him to stop playing tricks.

Everyone has to hide again as the Aquaphibian returns, this time accompanied by Agent X20, who's gloating about how his latest plan is such a success (we'll pause for just a moment to ponder: X20's identity is supposedly still a mystery to all at Marineville, so how come Troy's dreaming about him?).


The aquanauts decide there's only one thing for it: they'll have to set fire to the plans - which they manage easily enough with a bottle of brandy and some matches. But the fire gets out of control - and how are they going to get back into Stingray as they're all somehow much larger than it now?

As Troy awakens from his slumber to learn that the emergency's past, we remember the benefit of a dream story: you don't have to come up with an ending.

Anyone who finds tonight's BBC 2 documentary on the electric chair a bit depressing can switch over to watch Michael Aspel presenting the final of the Miss England competition over on BBC 1 shortly afterwards.
Tuesday 2 March

Tonight's Danger Man begins in the glamorous surroundings of a Notting Hill laundromat, where John Drake looks on as a furtive young woman (Kathleen Breck) retrieves a packet from a washing machine.

The girl heads to France with the packet, and Drake follows (with his fishing rod) after, checking into a hotel in Burgundy and learning from the register that the girl is one Kathleen Mary Martin.

In the hotel bar that evening, Drake finds himself coolly appraised by Suzanne (Ann Lynn), supposedly a holidaying schoolteacher.

She's soon overshadowed by the arrival of the gregarious Monsieur Lamaze (Warren Mitchell), a wine broker who insists Drake try the local product (and looks thoroughly offended when the nearby Kathleen orders an orange juice).

Drake follows Kathleen up to her room and confronts her about her activities. She immediately breaks down and reveals that she's being blackmailed by a man who has photos of the pair of them (having sex, we infer) which she doesn't want her parents to see. She is to carry defence secrets (in microdots hidden in a bag of confetti) to a chateau when she goes for a guided tour the following day. Drake announces that he will accompany her.

The crowds at the chateau prevent Drake seeing the woman (Sarah Brackett, who also had a small role in the previous week's episode) who takes Kathleen's handbag until she's nearly got away.

The woman makes off on a bike, and Drake nicks one from the chateau to follow after her, disturbing the peace of an elderly lady (sometime Hollywood character actress Anita Sharp-Bolster in a blink and you'll miss it part) in the process.


Drake stops at the old lady's house when his quarry briefly pauses outside - he exits to find her departing with both bikes. So he returns to the hotel - and finds Kathleen dead in her room. The bit part actress playing the maid who discovers him leaning over her body is hilariously awful.


Drake finds himself hauled before Police Inspector George Benson, and flung in a cell, where he gets a bottle of wine and a monologue on the effectiveness of the guillotine from jailer Victor Brooks. He cuts it short by knocking the jailer out and escaping.


Drake heads for the home of Monsieur Lamaze, who claims to believe entirely in his innocence. But after Lamaze shows off his Napoleon memorabilia they sit down to dinner, and Drake discovers that Lamaze's servant is the woman who eluded him earlier. There's not much time for this to sink in, though, as the police arrive at the door and Drake has to make his escape by tipping the table over on Lamaze and crashing through the patio doors.

He finds an outside entrance to Lamaze's wine cellar and hides in there, but the police come looking, so he tips an enormous wine racking on them and legs it once again.

This time he runs into the headlights of Suzanne's car. She gives him a lift back to her cottage, telling him she believes in his innocence (he's understandably sceptical). But after she's made him an omelette she pulls a gun on him. She's an agent for the French government, with her own burly henchmen (Larry Taylor and Michael Balfour), and she wants to know what he's up to. He appropriates Kathleen's story for himself (he changes the bit about a man having photos of the two of them having sex, though it would have provided a pretty damn good reason for blackmail in 1965).

Believing Drake works for Lamaze, Suzanne sends him back to get his co-operation with the French. Lamaze admits he had Kathleen killed - he had her bedroom bugged so he's fully aware that Drake's a British agent. Drake explains that the French want Lamaze to continue spying on the British, but to cut them in on whatever he finds out. Drake, however, wants to take Lamaze back to Britain to reveal the full details of his spy network.

Lamaze agrees to fall in with Drake's plan. Suzanne and her henchmen are on their way, and he drugs a bottle of wine to put them out of action. But he takes Suzanne off for a confab, and Drake begins to puzzle over why it's taking so long for the two burly chaps to be knocked out.

It turns out Lamaze only put sugar in the wine - he's been plotting with Suzanne and has now decided to do the bidding of the French. Suzanne has her men take Drake to the police, but the inspector no longer believes him to be guilty of Kathleen's murder - the real killer, Lamaze's gardener, has confessed. The inspector offers Drake a glass of wine before he goes, but the agent's wary: "Every time I'm offered a glass of wine these days, two men come and take me away."

Drake returns to Lamaze's house. The fishing rod he was so keen to take with him is in fact a gun which fires self-adhesive microphones. He sets one outside the window where Lamaze and Suzanne are chatting - happily, they're on the subject of the members of the spy network, and Drake gets all the details on tape.

Next, Drake puts the two henchmen out of action and follows Lamaze and Suzanne to the airport, where a plane is prepared to take Lamaze back behind the iron curtain.

"Have a glass of wine?" the strangely familiar pilot asks a perturbed Lamaze.


Wednesday 3 March
On BBC 2 this evening Spike Milligan presents his poetry and jazz show "Muses with Milligan" (John Betjeman is among tonight's guests) followed by a Horizon report on "The Great Computer Scandal". Later in the evening, viewers not keen on tonight's Wednesday Play (Marie Laine Douglas's Campaign for One with Barry Foster and Jeremy Kemp) can tune in to The Hollywood Palace, presented by Liberace and with performers including Edward G Robinson, Shani Wallis, Rowan and Martin and elephants Bertha and Tina.
Thursday 4 March
The current series of The Saint comes to an end next week, which is a shame because, the odd dull episode aside, it's seen a major improvement in the quality of the show. The best episodes have been as exciting as anything comparable offered by the cinema, and tonight's, scripted by Terry Nation and directed with tremendous verve by John Gilling (who was turning out some excellent horror films for Hammer and other companies at around the same time is among them.
We open at the Royal Festival Hall (stock footage of which the British programme-makers proudly show off for the benefit of their international audience). Simon Templar's there, enjoying a concert in the unlikely company of his regular sparring partner Inspector Claude Eustace Teal.

Teal's dozy state tips us off that he's not primarily there for the music. The real reason he's there is to point out a particular member of the audience to Simon.

This is Bernhard Raxel (Andre Morell), a multi-millionaire whose knack for making money has earned him the title "The Midas Man" (this episode is, in effect, Roger Moore's Goldfinger). Teal has reason to believe that his way of increasing his wealth isn't exactly legal, and that he and his personal secretary, Mr Crantor (William Lucas) are planning the biggest crime in history. Teal wants Simon's help in finding out exactly what it is.


How did Teal get this information? Well, he's got an inside man, who Raxel calmly dispatches on learning he's an informer (the distinctive blond actor who plays him had a similarly uncredited part in Tuesday's Danger Man). Peter Jeffrey plays Marring, another of Raxel's partners in crime.

Sarah Lawson plays Betty Tregarth, a workaholic scientist whose colleagues have finally pressed her into going on holiday. Her brother David (David Saire) - clearly gay - helps her pack. It's unusually easy to pinpoint where Betty lives - Oslo Court in St John's Wood.


Teal takes Simon to the airport (which Betty's also en route to), and explains his task further: he will have to impersonate Carl Munster, a renowned safecracker due to arrive in the UK to join Raxel's gang. Simon's the only possible candidate for the job, as he's the only safecracker as good as Munster. Alexandra Bastedo is on hand in a secret room at the airport to effect Simon's transformation.

Shortly after Betty arrives at the airport, she's approached by a "police officer" who informs her David's been in a car accident, and asks her to come with him. She's taken to a grim hovel of a place and locked in a room where Raxel addresses her via CCTV. He wants her to reproduce a nerve gas she's been working on for him - and to assure her co-operation he's kidnapped David and is subjecting him to all manner of tortures. Initially, she refuses. If my gaydar peeped on sight of David it pretty near exploded upon Raxel's response: "Pity. He really was quite a good looking young man" (Morell gives a gorgeously smooth villainous performance, but there's more than a whiff of old queen about it).

Eventually, Betty agrees to help Raxel, and is instructed to inject herself with a sedative (that's two people injecting themselves in one week).

In the guise of Munster (you'll be surprised to learn that Roger Moore's New York accent isn't terribly convincing), Simon is instructed to present himself at the Rake's Progress club, where he's greeted by Carry On actor Cyril Chamberlain.

Inside the club, Simon encounters a very forward young lady (Maggie Wright), who, on discovering he's not armed, throws him into the lift.

When it stops he's greeted by Crantor and the Marring, who set him the job of opening a safe while handcuffed, before the room fills with cyanide gas. It's tricky work, but he manages it. Marring, however, remains extremely sceptical about their new colleague's identity.

Betty awakens in a lab fully equipped for her to start manufacturing the gas. Raxel (in person this time) explains that he intends to use the gas "to steal several hundred million pounds". Raxel explains to Simon that he's recruited "the elite of the criminal profession" to help out in his scheme. He tries to quell Marring's suspicions by arranging for Munster's girlfriend to fly out from New York to identify him.

Raxel explains his scheme to the assembled crooks: he intends to steal both printing plates and special paper from the Bank of England in order to make millions of pounds of undetectable counterfeit notes.

Raxel puts Simon's safecracking skills to the test once more in a reconstruction of the Bank of England vault - Simon does a double take when he sees one of the dummy guards (could it be because it bears a strong resemblance to Patrick McGoohan?). Raxel explains that he has a special device that interferes with the impulses controlling time locks to enable breaking them.

An insight into Simon Templar's literary taste: he reads Isaac Babel's Collected Stories in bed while waiting for his police contact, Gray (John Forbes-Robertson, later to play Dracula in Hammer Studios' dying days), to get in touch. Gray has trouble getting through, so climbs over the wall into Raxel's grounds, where he's killed by Marring, whose suspicions increase when he later finds Simon examining the corpse.

But it looks like the matter of his identity is now to be settled for good as Munster's good lady, Gloria Mancini (Carol Cleveland) has arrived. Simon's as surprised as Marring when she positively identifies him straight away.

With this matter seemingly cleared up, Raxel decides to bring the job forward to that evening. The Bank of England doesn't know what's hit it (kudos to the chap below for his really wonderful "Argh, my head" acting).

The job goes ahead as planned, but, once the rest of the gang have removed their gas masks, Raxel, Marring and Crantor pelt them with gas bombs to ensure they're the only ones who get a share in the money. Simon escapes this onslaught and leaps on the back of the truck as they shoot their way out.

Their destination is the grimy house seen earlier, which Betty, David and Gloria have all been removed to prior to being disposed of. As Raxel crows about his success, Simon makes his presence known and an almighty ding-dong ensues.

Gloria, revealed as a police woman who replaced the real Gloria when she entered the country just as Simon did Munster, gets stuck in to the battle, disarming Raxel. He nearly knocks the gun out of her hand, but eventually falls foul of the gay brother.


We end with the happy revelation that, though the gas was intended to be fatal, Betty changed the formula to ensure it only stunned people.
Friday 5 March
Tonight, the recent series of The Likely Lads begins a repeat run on BBC 1, followed by Club Night from the Lyceum Rainbow Club, Barnsley. Guests include Jimmy Jewell and Ben Warriss, Armand and Anita, and Nino and Wendy Frediani.
You can find full Radio Times listings for this week's BBC programmes here.
Outside the box
And to play us out...
It's Wayne Fontana and the Mindbenders, at number 2 this week (the Seekers having reached number 1), with their contention that "The purpose of a man is to love a woman, and the purpose of a woman is to love a man". Some of us have found quite a different purpose, thank you very much Mr Fontana. You can find the full chart for the week here.
Fifty years ago in 1965,BBC & Independent Television Programmes with Doctor Who starring the late William Hartnell as The First Time Lord and he stayed from November 1963 to October 1966,followed by Sherlock Holmes with Nigel Stock & Douglas Wilmer.
ReplyDeleteStingray episode Tom Thumb Tempest shot in colour with Troy Tempest & Phones with The Teleplay by Alan Fennell and The Director Alan Pattillo and The Producer is The late Gerry Anderson.
The Worker is the great original comedy show starring the late Charlie Drake and Percy Herbert.
The Human Jungle starring the late Herbert Lom as Doctor Roger Corder and the guest star is Sylvia Syms and the late Edward Judd.
Danger Man Episode Have A Glass Of Wine with the late Patrick McGoohan as British Secret Agent M9 John Drake alongside Ann Lynn,Larry Taylor,Warren Mitchell and Kathleen Breck.
The Saint Episode The Crime of The Century Screenplay by The late Terry Nation Starring Roger Moore as The Famous or infamous Simon Templar with Inspector Claude Eustace Teal played by the late Ivor Dean alongside Andre Morell,Peter Jeffery,Sarah Lawson and William Lucas.
The Great Original Memories of BBC & Independent Television Shows of 1965.
Terry Christie,from Sunderland,Tyne & Wear.